Thursday, September 17, 2015

Stop Putting off your Pantry. TODAY!


Almost without fail, the pantry is the one of the main trouble areas for my clients—surpassing garages, storage areas, and even bathrooms! I charge this avoidant behavior with the frequency that we use the space. Families are constantly in and out of the pantry! With so many hands constantly grabbing for things, it’s unlikely that it maintains any sort of order without a solid system in place.  As usual, I have a list of things to get you started; it’s easier than you think:
·       First off, categorize, categorize, categorize! This should be self-explanatory: all jars together, cans, baking goods, cereal, etc. etc. You get the point. Mulit-purpose bins from The Container Store are perfect for so many items in your pantry. 


·       Separate silverware, straws, plates, cups, and napkins into bins accordingly.


·       Get one bin for dips and seasonings alike!


·       Cans get lost easily if you don’t store them correctly. For the canned items you use most often, use my favorite multi-purpose bins with labels. If you utilize labels, you can even mix different types of canned food. If you have a smattering of different types of cans, use a stackable bin so that you can see what you have on hand easily.


·       Baking items and dry goods such a flour, sugar, and rice will naturally go into larger bins—this goes for any items that you use in large quantities.


·       Plastic bins are a boring, but practical solution for snacks and things you can grab on the go.


·       Get an organizer for your plastic wrap, plastic baggies, and aluminum foil. They will bring so much order to the chaos!


I promise that if you take the steps to invest and incorporate these items into your pantry system, there will be no excuses for your family not to follow suit.

 photo siggy_zps9116f3f2.png

Tuesday, September 8, 2015

Labels: The Ultimate Organization Tool


You had to have known it was coming. I preach labels nearly every week and I owe it to you all to let you know just how fond of labels, as an organizational essential, I really am. Labels are the seemingly tiny detail that makes all the work of organizing your space worth it in the end. They take organization to extreme daily function, but are typically the last touch that most people don’t bother with at the end of the long process of getting your space in tip-top working order. I know that it takes a long time to complete an organization project and labels are WORTH considering—you’ll be thanking yourself the next time you’re reaching high in a closet in desperate search, or moving around boxes in the dim light of your storage below the stairs. Here are a few suggestions that I find helpful:
·       Get a professional label maker—my favorite is the Brother PT-70SR Personal Handheld Labeler.
·       As far as tape goes, I strongly suggest one that splits down the middle to take the backing off, this is the absolute easiest way to label!


·       Consider getting chalk labels that tie on for baskets or bins that have holes in them. This is also a good for items that you don’t necessarily want seen through the container.


·       Post-its and packing tape work great as labels for storage units, garages, or basements. This includes holiday decoration storage. With larger bins, it helps to have larger lettering so your items are easy to find.


·       Color code! To all of you who want extra credit—colored duct tape works great for this purpose.


Have I convinced you of the transformative power of labeling? Comment below with anything I’ve left out!  

 photo siggy_zps9116f3f2.png

Wednesday, September 2, 2015

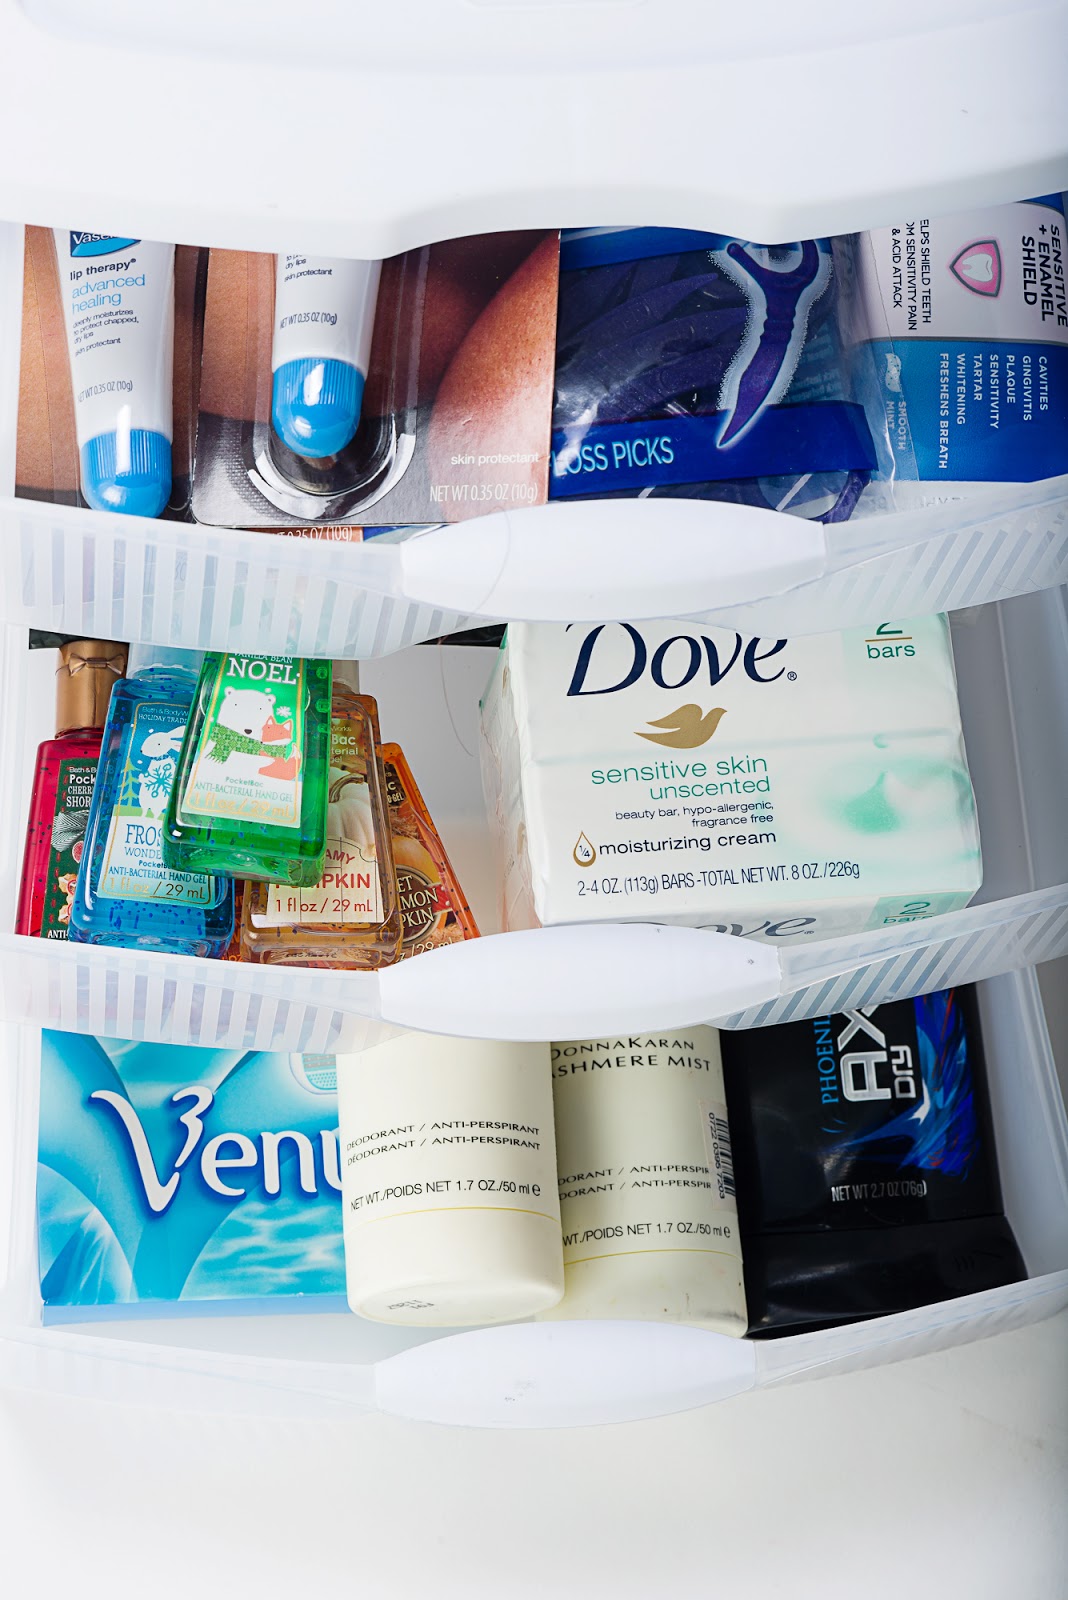
Smart Storage for Excess Toiletries


Most of us collect a surplus of bathroom supplies; either from coupons, Costco bulk, or plain forgetfulness, it just sort of happens. While shopping in bulk can actually be a great way to save money, it does no good if you don’t have a functional system to store, use and rotate your extra supplies. Rather than shoving your goods in any available nook, find a place to designate to your toiletries and avoid overbuying.

Start with a space such as a drawer, a cupboard, or a bin that fits snug under the bathroom sink. Gingerly place all of your extra toothpaste, toothbrushes, deodorant etc. in the space of your choosing, LABEL that baby and you’re set. Most import, utilize this space! Having all of your items in a convenient space allows you to see what you have on hand, thus saving you those precious pennies. This is such an easy organization project everyone, even beginners can handle this one!


 photo siggy_zps9116f3f2.png

Wednesday, August 26, 2015

Laundry Room Run Down


In my family, we use two different laundry soaps—one for my sensitive skin, the other for heavier washes and stained clothing. Now, of course I’m going to immediately complicate things, but if you’ve been following me for very long, you might have an inkling about what I might suggest here. YES. Bins. They are really your best organizing tool on most fronts. Here are my suggestions for all of the fancy laundry items that you want to look great and function well:

So, first off, laundry pods are definitely the way to go. You avoid the mess of powder and liquid and they work remarkably well. I put my two separate laundry pods in bins with labels. It makes your laundry loads so much easier to organize and they look great stowed away in cute bins or baskets.


Here’s my next bin suggestion—get a cute bin for all of your small laundry necessities. Mine includes Shout packs for nasty stains with a toothbrush to scrub, a Tide stick, lint roller, and a lingerie wash bag. What else do you keep as an absolute laundry survival tool? Add it to the bin along with anything else that needs a home and follows suit.


Get a jar for that extra money that comes falling out of your family’s pockets. Someone should be collecting from all the hard work! Follow my mom’s rule—you leave it, it’s hers! Even if the change doesn’t land in your wallet, there are lots of helpful things to save for. The jar is just a nice place to keep it.


Remember to leave your comments below. Oh, and don’t forget to catch my guest post on Very Jane. It’s one of my favorite online spots right now and I give some great tips on organization that take only 10, 30, and 60 minutes each week!

 photo siggy_zps9116f3f2.png

Wednesday, August 19, 2015

DIY Homework Station: More Worth than its Work


With “back to school” in full swing, I propose that before the grind of daily homework, early bedtimes, and the added complication of extracurricular activities, you consider incorporating a station complete with all the materials your little ones need to start the year off on the right foot. A homework station made from a shower caddy and/ or rolling utility cart is a great option to keep all of your children’s supplies together to make cleaning up compact and effective. Utilize all the space and nooks of the bin. It also helps to set the mood for homework time—when the bin comes out, they know that it’s work time! This is what I filled my homework station with:


·       A cute tape dispenser, stapler and extra staples.


·       Crayons and markers—let them pick out their favorites.


·       Mechanical pencils. Don’t forget to include extra lead, this will help derail excuses.
     Calculator. Get your kids their own so they aren’t distracted by your iPhone.


·       Pens (if they are allowed to use them in their classroom).
·       Scissors


·       Don’t forget post-its!!


·       Card games—optional. Sometimes homework drags on and on and they need a break. Let them take a 15 minute break when they get frustrated before they come back to their work. I like card games over video games and they seem easier to pull them away from in order to get back on task. They also allow them to culminate creativity with ease—it relaxes them and lets them really rest their brain.


For your storage system, I also really like the tiered units! Find a good use for the top tier, make sure it’s filled with something you access often and need handy on a daily basis. The second tier is great for books, coloring books, and activities to make homework breakdowns less frequent. Remember that switching back and forth from right brain to left brain really helps to keep them engaged, especially when homework hours get long. The bottom tier of your unit can be used for blank scratch paper or doodling paper.


School starts this week for most of us so all of these supplies are on great deals! Add them to your list and build a functioning homework station. It will make homework hours so much more organized productive. Leave a comment if you have any other suggestions to add!


 photo siggy_zps9116f3f2.png
SITE DESIGN BY RYLEE BLAKE DESIGNS